0

Safari-Themed Desserts

We’ve found that Safari-themed desserts are super popular right now, which is great news for us! They are a favorite of ours at 12 Oaks Desserts for many reasons. Not only are there so many animals to design around, but there are also many directions one could take the design aesthetic. From cute little cake pop animals, perhaps in a cartoon style or maybe a more realistic likeness to classic animal prints, really the sky’s the limit. Certainly, the purpose of the event helps to steer the design, whether it’s a child’s birthday party or baby shower, or even a fun bachelorette party theme. Here are a few of our favorite Safari-themed creations that we wanted to share with you!

Classic Safari Cake Pops

Safari Animal Cakepops

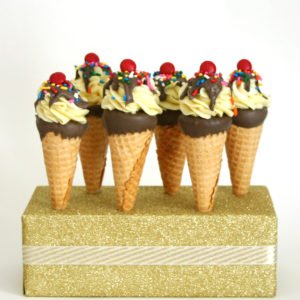
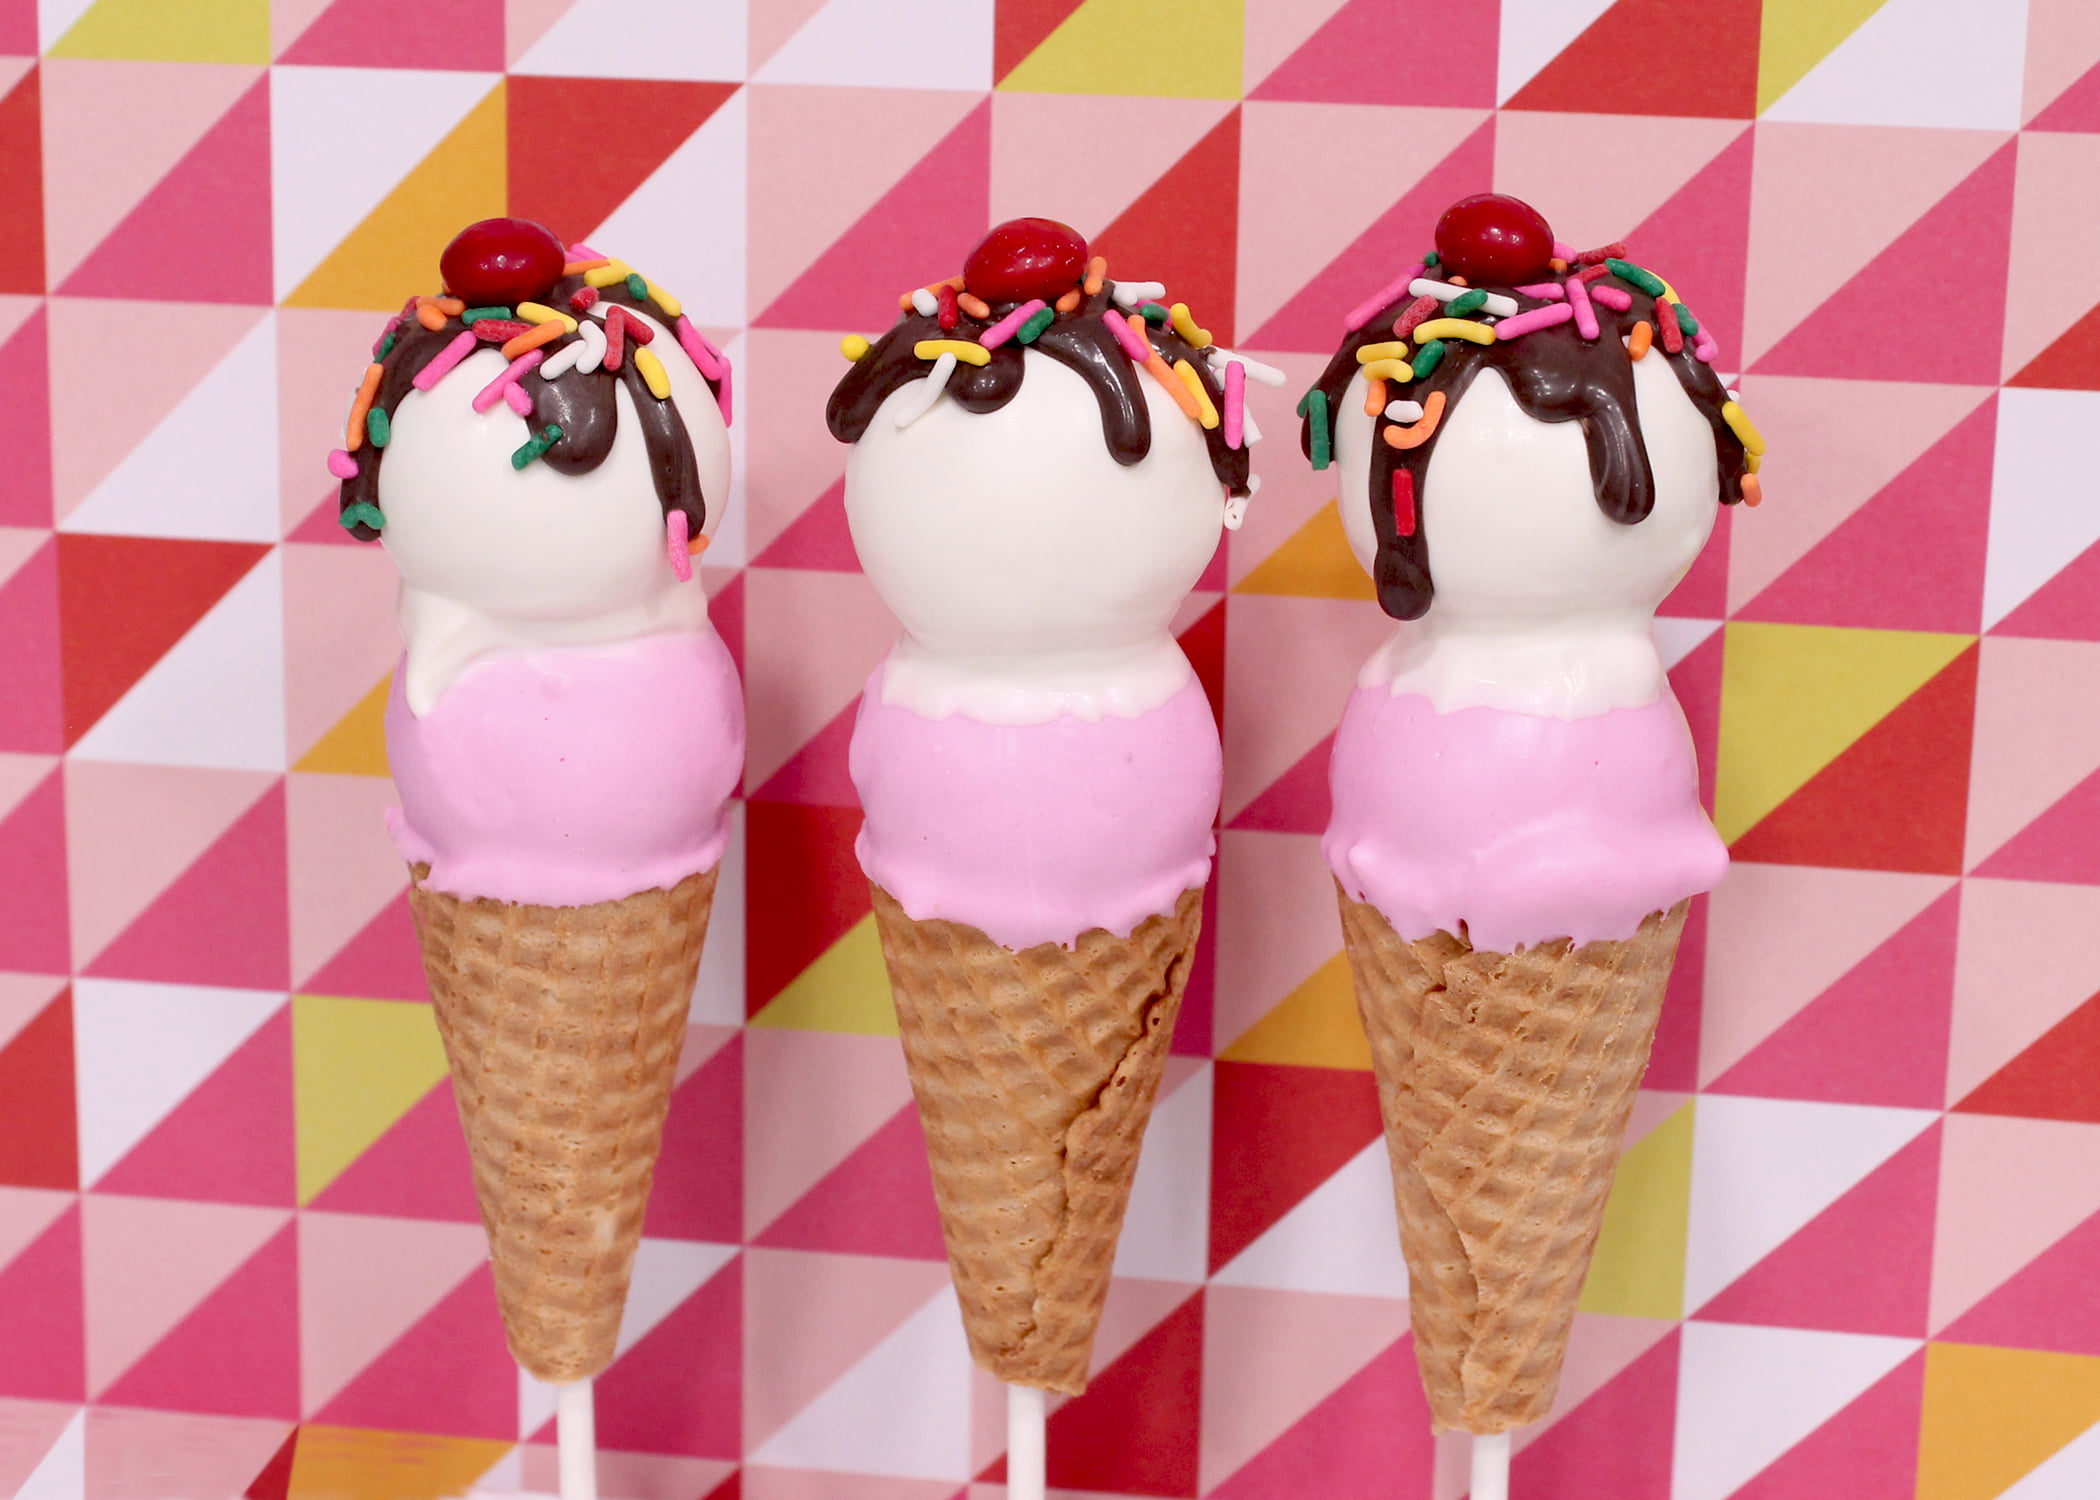
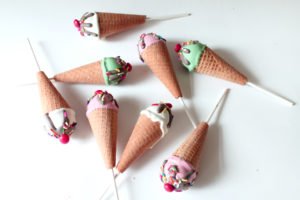
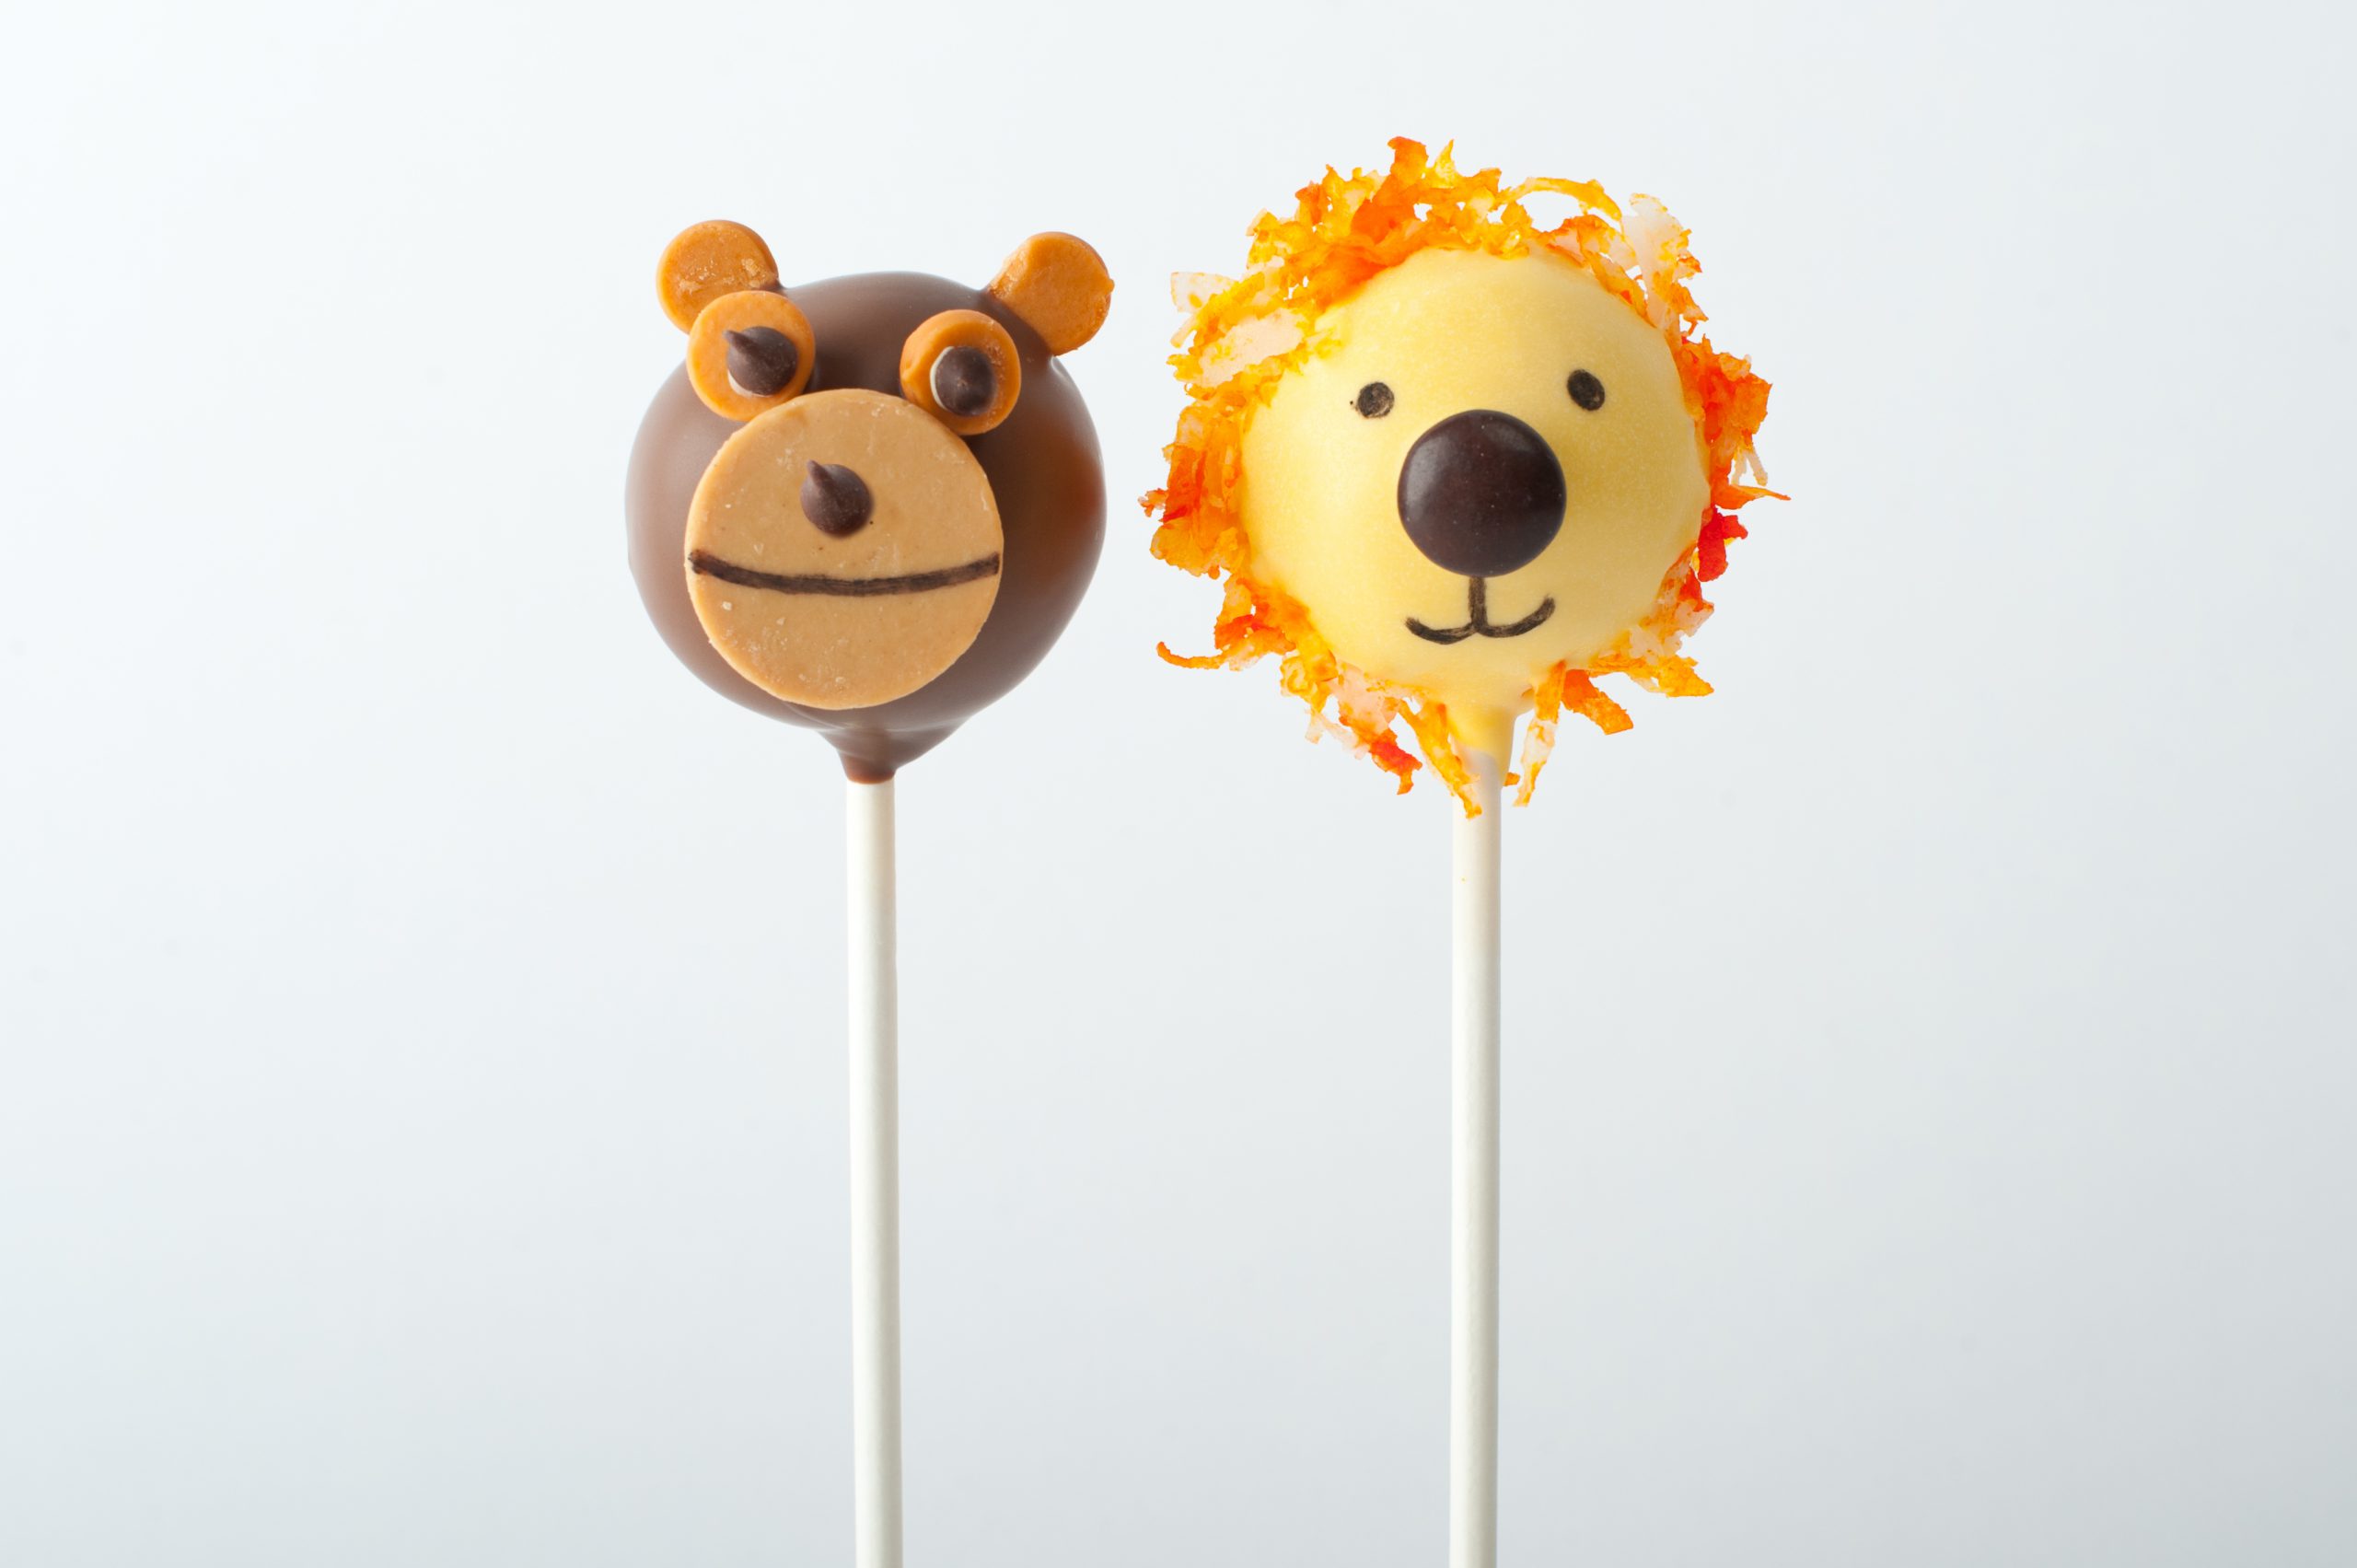
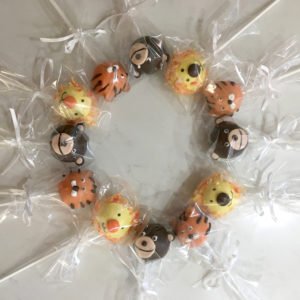
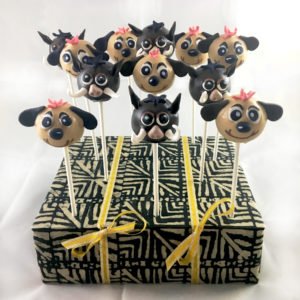
Our Safari Cake Pops have been a staple at 12 Oaks Desserts since our early days in Manhattan. When we originally designed these cake pops, we wanted to make a perfectly adorable cake pops for little ones’ birthday parties, and (if we do say so ourselves) we feel like we nailed the cute part. We also wanted to create something that didn’t rely on fondant for the detailing. Our classic Safari Cake Pops include 3 animal variations: lions, monkeys, and tigers (oh my!). Our favorite part to create is the lion’s mane. Here’s the secret, we use shredded coconut! Add some to a ziplock bag, add a little food coloring – we like to use orange and yellow and not mix it lightly so you still get variations on the mane. We used M&Ms for the nose and then edible marker for the rest. For the monkeys, we used a light brown candy melt for the mouth, and then the rest is chocolate chips in different sizes and flavors (butterscotch for the light brown). 

 Safari Animal Cakepops Wrapped

While we love the little safari gang we’ve created, we’re always up for a challenge and are happy to create new Safari animals to join the party upon request. In fact, we once created a dessert table for a Lion King-themed birthday party and included some Timon and Pumba cake pops that turned out to be super cute too! We loved making those fondant warthog tusks for Pumba! Yes, this one definitely needed fondant for the details!

Timon & Pumba Cakepops

Safari Print Cake Pops

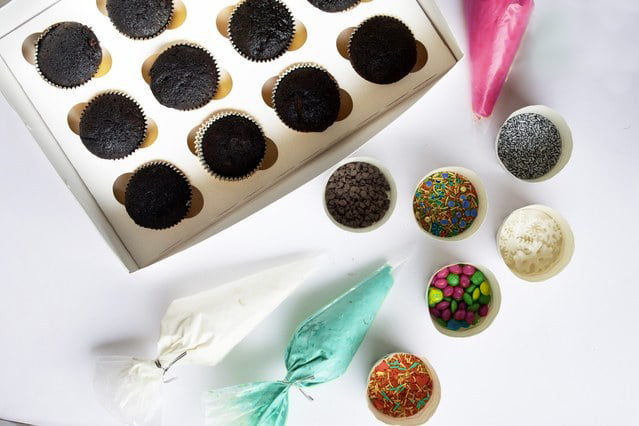
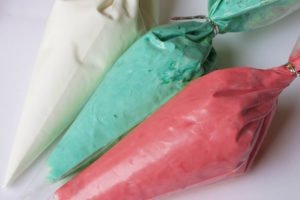
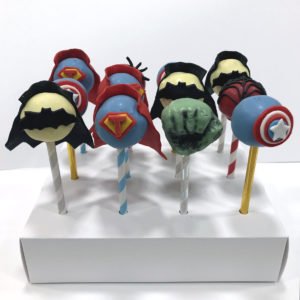
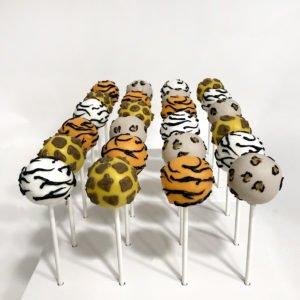
Well, Vogue called it last year: Animal print is making a come-back. And we must admit, we’re very excited about embracing this trend. We first made animal print cake pops years ago and tried out a new edible paint we’d just gotten in the mail. Sadly, it didn’t dry on the chocolate (even after 24 hours). And this is why you should never experiment with new products on actual orders. Lesson learned! We had to redo them and then we used melted chocolate to pipe or “paint” the designs. We recently had the chance to create some again for a special bachelorette party and we were very pleased with how these turned out (now that we knew what we were doing). These cake pops do require some time and patience, as piping the melted chocolate can be a bit tedious. Our favorite was the tiger print — so cool! 

Animal Print Cakepops

Custom Cakes: Safari Baby Shower Cake

Safari Baby Shower Cake

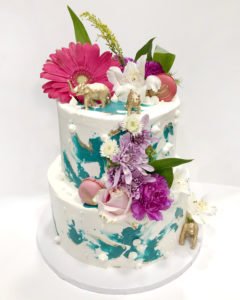
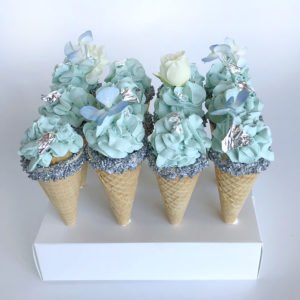
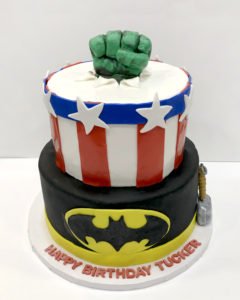
Another of our favorite Safari-themed orders was a custom cake for a Safari-themed baby shower. The client provided the color scheme and asked for a two-tiered cake to serve 45 guests. That was it! The rest was up to us. Sometimes it’s even harder to create a design when the sky’s the limit because we always have so many ideas! We’ve always been inspired by Bon Vivant’s cakes in Chicago and wanted to create something similar, but with our own spin on it. We knew we wanted to use the bold colors in the flowers, but still wanted pops of color on the actual cake. We used a palette knife to paint on splashes of the teal blue buttercream which we then accented with edible gold leaf. We added some macarons because they’re just so yummy and fun. And finally, we spray painted little safari animal figures with edible gold paint to tie in the whole safari theme.

We love that animal print and safari-themes are still going strong. We can’t wait to see what new safari-themed desserts clients are in need of next. Maybe some elephant or giraffe cake pops? So if you’re thinking of going safari for your next party or event, be sure to reach out to us on our custom ordering page so we can start brainstorming together! 

Yours sweetly,

Katherine

Cheesecake Cones: A Sweet 12 Oaks Invention!

Here at 12 Oaks, we’re always trying to think of new ways to make our desserts more fun and interesting. From entirely new products to clever tweaks on our existing treats, we like to keep it fresh and delightful. 

 Cheesecake Cones

Our Cheesecake Cones came to be from several such brainstorming sessions. We asked ourselves, what would be an exciting and fun way to deliver individual servings of cheesecakes? We were very inspired by Nectar and Stone, an Australian bakery that was creating a lot of desserts in cones. And just generally seeing a lot more “cone” desserts. We’d already created our “Mini Cheesecakes”, which are individual servings in glass jam jars or cupcake liners, but we liked the idea of being able to eat the dessert without utensils or on the go. Plus, we’re always looking for more ways to be environmentally friendly and cheesecake in a cone is the perfect no-waste individual serving! And as a result, Cheesecake Cones were born! 

Anatomy of a Cheesecake Cone

In today’s world where we’re all working to create less waste, desserts served in cones feel like a no-brainer, so we took to the concept of Cheesecake Cones with excited gusto. But how to best translate our classic cheesecake into a cone?? The elements of a cheesecake, graham cracker crust, smooth, rich cream cheese filling, needed to be showcased in this new medium. 

In the end, we decided to bake our full-size cheesecakes before transforming them into Cheesecake Cones. (Our special cheesecake recipe is a well-guarded family secret and our cheesecakes are much beloved by clients so altering the recipe to create a “no-bake” cheesecake is a non-starter for us.) Instead, we create a full-size cheesecake, then use the graham cracker crust to fill the sugar cones with pieces of crunchy, delicious graham cracker crust. Then we pipe the cheesecake filling into a gorgeous swirl on top of the cone. Who knew cheesecake filling could be piped – we didn’t until we tried! We find the sugar cone adds a nice extra crunch and texture to make for the perfect bite. And in our opinion, cheesecake in a cone is just so eye-catching! Delicious: check! Fun: check! Unique: most definitely, check! 

Classic NY Cheesecake Cone

Fun Accompaniments

We offer 5 delicious flavors for our Cheesecake Cones, including Citrus, Classic NY style, Cookies & Cream, Strawberry, and Pecan Pie. One of our favorite parts of designing our Cheesecake Cones was deciding which accompaniments make sense for each flavor and how best to arrange for the cones to create the ultimate “wow-factor”. Our three design faves are our Classic NY, Citrus and Strawberry. 

Classic NY is the ultimate in class, topped with a gold-dusted raspberry, chocolate-dipped graham cracker (doubles as a little scoop/spoon) and a light wafer straw. We love how the Classic NY cheesecake cones remind us of a fancy date-night in Manhattan.  

Classic NY Cheesecake Cone Closeup

Our Citrus flavor is a lemon-lime sensation and it’s just the right amount of tart. We like to pair this flavor with a sprinkle rim along the top of the cone, to give it a little sparkle. Then we also include a candied lemon wedge and again the graham cracker scoop to finish off the cool design.

Citrus Cheesecake Cone

Our Strawberry Cheesecake Cones are a sweet delight and these treats stole our hearts from the moment we saw their beautiful pink color piped into their cones. With a hot pink sugar rim surrounding their cones and topped with a gold-dusted, perfectly ripe strawberry, we can’t help thinking that these are the prettiest in pink treats that we’ve seen. 


Custom Designs 

We’ve also created some extra-unique cheesecake cone designs for special occasions. For one young client’s first birthday party, we used food coloring to create a blue classic cheesecake prior to piping into the cones. We also incorporated blue sprinkle rims and edible silver leaf to complete the look.

Custom Blue Cheesecake Cones

We’ve also created cheesecake ice cream sundaes, again using our classic cheesecake recipe and special accompaniments of a chocolate-dipped rim, chocolate drizzle, sprinkles and a cherry on top. With the cheesecake sundae, we loved the pairing of the rich cheesecake with the chocolate drizzle — very decadent! 

Ice Cream Sundae Cheesecake Cone

Our Cheesecake Cones have a special place in our heart and we love creating them — especially custom additions! If you’re looking for a unique treat for your next birthday or party, definitely try these.


Yours sweetly, 

Katherine

Celebrating National Ice Cream Month With Ice Cream Cake Pops!

    Ice Cream Cake Pops

July is a month that always evokes our favorite summertime memories: running through the sprinklers, lazy bike rides in the summer heat and, of course, enjoying delicious ice cream cones. Since 1984 July has been proclaimed “National Ice Cream Month” and the third Sunday of the month considered “National Ice Cream Day”. This year, we propose celebrating with a cone that we promise won’t melt all over your hand: 12 Oaks’ Ice Cream Cake Pops! Delicious and unique, our Ice Cream Cake Pops are a fun and different way to celebrate National Ice Cream Month. Plus, they also taste delicious with their classic ice cream cone.  

Anatomy of an Ice Cream Cake Pop

Ice Cream Cake Pops

What’s in an Ice Cream Cake Pop, you ask? Well, we start with our classic cake balls in one of our ten flavors, paired with a sugar cone, cut to mini-size. People often ask if we buy special mini-sized cones, but nope, just the standard ones from the grocery store will do. All you’ll need to do is cut a little hole at the bottom for the stick to go through and cut about an inch off the top for the cake ball to rest on. Our first step is just like making a regular cake pop. We dip the stick in a tiny amount of melted chocolate and insert about two-thirds of the way into the cake ball. Once it’s dried, we then dip the top of the ice cream cone into the candy melt and “glue” it to the cake ball.  At this point, we’ve created the base for our ice cream cone and it’s on to the fun part: decorating and designing! 

These cake pops are customizable in so many ways, from candy melt color to sprinkles and really everything in between. We start the process by dipping the top of the cake pops in cute candy melt colors. Don’t worry if some of it drips down the side of the cone – that’s what ice cream does! Next, we drizzle another color of candy melt on top to mimic a classic “sundae” ice cream cone. We usually do it in a white chocolate or dark brown color, but it’s up to you! We top it all off with sprinkles and an M&M or Skittle as the proverbial cherry on top. When you bite into our Ice Cream Cake Pop, it’s a delightful pairing between the cake pop, drizzle chocolate, and crunchy sugar cone.

Ice Cream Cake Pops

Don’t get us wrong, Ice Cream Cake Pops do tend to be a labor of love — there are lots of steps to create those cuties! — but the adorable result is certainly worth the effort. We also like that these cake pops are like snowflakes: no two Ice Cream Cake Pops are the same because when we dip them and drizzle the chocolate on top, they’ll inevitably turn out a bit different than the last cake pop. 

If you’re looking for a real show stopper for your July events and parties, why not try our Double Scoop Ice Cream Cake Pops? With two “scoops” of cake bites, these are double the fun and oh so yummy. Visit our custom order page to order double scoop ice cream cake pops so that we can collaborate with you on flavors and design! 

Double Scoop Ice Cream Cake Pops

Other “Ice Cream” Treats to Try!

If you’re celebrating a special occasion in July, why not make it Ice Cream themed? In addition to our Ice Cream Cake Pops, we also offer other Ice Cream desserts, like our Melting Ice Cream Cake and our Ice Cream Sundae Cheesecake cones

Melting Ice Cream Cake

Our Melting Ice Cream Cone Cake (an ode to the one and only Katherine Sabbath who came up with the idea) is a gorgeous drip cake that showcases an extra-large melting ice cream cone (in fact, the melting ice cream is actually one of our cake pops in disguise — what a treat!). We love customizing this cake, mixing it up with colors and sprinkle pairings. This is a fun cake for anyone’s birthday; from kids to adults, it’s sure to bring a joyful smile to their face, even before they try a bite. For one special client’s birthday event, we created an entire ice cream dessert table, complete with our Melting Ice Cream Cake and our Ice Cream Cake Pops. It’s still one of our favorite dessert tablescapes. 

Ice Cream Themed Dessert Table

Another fun option for your July Ice Cream event is incorporating our Ice Cream Sundae Cheesecake Cone. Our Cheesecake Cones are a unique 12 Oaks invention (look for a blog post on these delicious treats coming soon!). We create these by filling our sugar cones with our sweet, crunchy graham cracker crust, then we pipe the cheesecake filling into a gorgeous swirl on top of the cone. Our Ice Cream Sundae Cheesecake cones boast a similar design to our Ice Cream Cake Pops. You’ll notice from the picture that we include special accompaniments like a chocolate-dipped rim, chocolate drizzle, sprinkles and a “cherry” on top.

Ice Cream Sundae Cheesecake Cone

This year, why not enjoy all the Ice Cream treats in your arsenal? From Ice Cream Cake Pops to Ice Cream Cake to Ice Cream Sundae Cheesecakes, we’re here to think outside of the box and delight your palate this July. Order any of 12 Oaks’ Ice Cream themed treats this July and also enjoy 10% with code ICECREAMDAY2020!

Happy National Ice Cream Month, everyone! 

Yours sweetly, 

Katherine & Missy

DIY Cupcake & Cake Pop Kits: Let’s Fight The Quarantine Crazies!

With the onset of COVID-19, the last few months have been challenging and scary for all of us. And with so many changes to everyday life, it’s been a whirlwind. The 12 Oaks team decided to create a new set of products to help distract from the stress of quarantine and working from home. So our DIY Decoration Kits were born! We’ve created both a DIY Cupcake Cake (available for delivery across Los Angeles) and a DIY Cake Pop Kit, which is available for nationwide shipping.

Whether you’re looking for a diversion for the kids or are in need of fun distraction yourself, the DIY Decoration Kits are the perfect remedy for when you’re feeling a bit stir-crazy. And huge plus: you get to eat the beautiful fruits (i.e. cupcakes and cake pops) of your labor!  But you’ve never decorated a cake pop before? Or you’ve never used a piping bag to apply frosting to a cupcake? Not to worry! We’re here to help and have a few tips and tricks to get you started creating fun and delicious treats. 

DIY Cupcake Kits

Our Cupcake Kit comes with 12 freshly baked 12 Oaks cupcakes, 3 frosting colors and 6 sprinkle and candy combos, delivered directly to your door in Los Angeles. You’re able to choose your cupcake and frosting flavors from among our many offerings. Our favorite combo is chocolate chip cake with classic vanilla buttercream frosting, but our clients’ top picks are our red velvet cake with classic cream cheese frosting and funfetti with classic vanilla buttercream (yum!). In addition, we also offer customization of the colors of the sprinkles, frosting, and candy included in the kit. The frosting will arrive ready to go in piping bags so you’re set to get to work once your kit arrives. 

DIY Cupcake Kit

Piping Frosting Tips (pun intended)

If you’re new to using a piping bag to apply frosting to your cupcake, there are some simple techniques you can use to get a perfect frosting swirl. Once you become a master decorator, you’ll probably use a tip on the frosting bag, but since our frosting bags arrive pre-packaged without one, we’d suggest cutting off a tiny bit of the tip of the bag. Basically, start with a small cut since you can always cut a larger hole if needed, but you can’t go smaller! Since you’re not working with a traditional piping tip, it’s time to get creative! We always see a traditional swirl — why not try something new? Go in a zigzag pattern, try going up and down, do dots, etc. 

Frosting Bags DIY Cupcake Kit

If you want to try your hand at making swirls, you should cut about a 1/2″ on the pastry bag to get a nice round opening to do the traditional swirl. Tip: Start in the center of the cupcake and go outward. And be sure to apply even pressure so you don’t end up with a lopsided frosted cupcake. Another fun option if you haven’t cut too much of the bag: you could try cutting different shapes. For example, try cutting a V in the bag and seeing what comes out. Just be creative! And for those trying to achieve more advanced frosting techniques, and who have their own pastry bags and tips at home, feel free to empty our bags and use your own.

Sprinkle Tips

Adding your sprinkles or candy is another way to get creative and have fun. One cool idea to try is to add different textures. For example, add some frosting, then cover it in sprinkles, and then add another frosting swirl in another color without the sprinkles, thereby giving the cupcake some interesting textures. Or try mixing 2 different sprinkles to create new sprinkle combos! In general, there are no bad ideas, when it comes to sprinkles, only more deliciousness! 

Sprinkles DIY Cupcake Kit

DIY Cake Pop Kits

Our Cake Pops Kit arrives with a dozen freshly baked and dipped 12 Oaks cake pops, 3 candy melt colors and 6 sprinkle and candy combos. You’re able to choose your cake pop flavors from among our many offerings. We recommend the red velvet – it’s our favorite! Your cake pops arrive pre-rolled and dipped in candy melt (we’ve done the hard part for you), and are a blank canvas for your decorating inspiration. In addition, we also offer customization of the colors of the sprinkles and candy combos, and also the candy melt included in the kit. Plus, our cake pop kits can be shipped nationwide, so you can send some love and inspiration to friends and family who are also feeling antsy at home.

DIY Cakepop Kit

Cake Pop Decorating Tips

The most important thing to remember with the cake pop decorating kit is to be patient while melting the candy melt. This is why we fondly call them Labors of Love. Once the candy melt is melted, it will work as “glue” for the sprinkles and candy. However, it will also dry quickly, so you need to work fast. Should the candy melt harden, no worries, just pop it back in the microwave to soften. 

We recommend, again, starting with a small hole in the piping bag because you can always make them larger, but you can’t go the other way! Have fun with the designs – you can make swirls, zig-zags, polka dots, you name it! And it’s fun to mix ‘n match the colors. Here’s an example of some of our favorite cake pops. These don’t have sprinkles, but feel free to throw them onto your drizzle designs! 

Pastel Cakepops

With either DIY Decorating Kit, you’ll find inspiration as well as a delicious treat awaiting you at the end of your endeavor. What a fun way to spend an afternoon — challenge yourself and your family to try something new! Order a DIY Cupcake Kit or DIY Cake Pop Kit on our website today! 

Yours sweetly,

Katherine & Missy

Planning A Super Birthday Party With Our Superhero Treats

Does your little one have a love for all things Superhero? Or is your partner the superhero in your life? At 12 Oaks Desserts, we love a good Superhero themed party, whether it’s a party for a child or a kid-at-heart, there are so many options to make the desserts fun and unique. We’ve had the opportunity to create desserts for a few Superhero birthday parties in the past and wanted to share some of our favorite designs. 

Superhero Cake Pops

Superhero Cake Pops

Our Superhero cake pops were so much fun to design and make! These were for a special client’s 8th birthday party. We chose to use each hero’s icon on their respective cake pops. Our favorite was making the Hulk’s fist — it came out (as intended) a little rough and felt like the perfect embodiment of the Hulk in cake pop form. We used fondant for the capes and details on the other cake pops, and chose color-coordinated straws for each hero. Did you notice the “T” on Superman? No, it wasn’t a mistake, we used the birthday boy’s first name instead!  We are big believers in the motto that it’s the little details that make the finished product feel just right. 

Superhero Cakes

We’ve had two opportunities to design and create Superhero birthday cakes. While fondant isn’t always our first choice, for both events’ cakes it was needed to create the looks that the clients had in mind. In the cake on the left, we used the fondant to create the ripped effect of the Hulk’s fist punching out of the cake. As we hadn’t ever created a fondant fist before, it took a few tries to get it right. The easiest way we found to make it was to create an actual flat hand out of fondant (think Kindergarten art project), then bend the fingers into a fist and finally sculpt and add details from there. Adding some black petal dust gave it that gritty and rough look which we loved. We enjoyed creating this top tier as it evoked a sense of action that you typically can’t capture when designing a cake. The two-tiers allowed us to incorporate a lot of different Superhero elements. The birthday boy’s favorites (as you can see) were Batman, Captain America, Thor, and the Hulk. 

Square Superhero Cake

Our second Superhero cake was for a special 5-year-old’s birthday celebration. They were in need of a cake to serve 30 guests and we landed on a square design to allow us to incorporate the birthday boy’s four favorite superhero characters: Iron Man, Batman, Spiderman and Superman. Again, fondant was a key tool in achieving the right look for this cake, in order to include the superheroes’ four signature colors in each corner. As an added bonus, the quadrant design was helpful for the parents so they could easily cut pieces from each child’s favorite superhero. At a child’s birthday party, any way to make the cake distribution go faster is a plus! We again added some black petal dust and black fondant detailing to create a more industrial and gritty look for the cake. We also used edible images for the logos to ensure they were perfect. Next time we’d probably use some superhero cookie cutters (JB Cookie Cutters has an amazing selection and we love them), but when you forget to order them in time and are in a pinch, edible images can save the day. 

What’s Next For Our Superhero Cakes

We are always brainstorming in the kitchen at 12 Oaks and thinking of new ways to expand upon our designs for specific themes. For our Superhero treats, there are plenty of options and opportunities to make a Superhero party special. One idea we’d love to create one day is to do a hero vs. villain party, where we could design cake pops for both the heroes and their most iconic villains. We also like the idea of doing a dessert table and incorporating different dessert mediums for different heroes. As an example, we could make some green dirt pudding for hulk or special marshmallow “hammers” for Thor, in addition to cake pops or cupcakes designed around the other Superheroes. Truly, there are so many ideas to choose from! And at 12 Oaks we prefer to design around a client’s preferences to make the party unique and special for them. So contact us here to start discussing your next Superhero birthday party! 


Yours sweetly,


Katherine & Missy